Expenses
The Expenses module allows users to track and manage business expenditures efficiently. This section covers how to add, manage, and import expenses, as well as set up recurring expenses.
Viewing Expenses
- Navigate to Finance > Expenses in the left menu.
- The Expenses dashboard displays a list of all recorded expenses, showing item names, prices, employees, purchase sources, purchase dates, and approval statuses.
- You can filter expenses by Status or Date Range using the filter options at the top.
Adding a New Expense
- Click the + Add Expense button.
- Fill in the required fields:
- Item Name – Enter the name of the expense.
- Currency – Select the appropriate currency.
- Exchange Rate – Set the conversion rate if applicable.
- Price – Enter the cost of the expense.
- Purchase Date – Choose the date of purchase.
- Employee – Assign the expense to an employee.
- Project – Associate the expense with a specific project.
- Expense Category – Choose the appropriate category.
- Purchased From – Specify the vendor or company.
- Bank Account – Select the bank account used for the purchase.
- Description – Optionally, provide details about the expense.
- Bill – Upload a receipt or invoice for the expense if needed.
- Click Save to record the expense.
Managing Recurring Expenses
- Click Recurring Expenses to access existing recurring expenses.
- Click + Add Recurring Expense to create a new recurring expense.
- Enter the required details, including:
o Item Name, Price, and Currency
o Project, Expense Category, and Vendor
o Billing Frequency (Daily, Weekly, Monthly, etc.)
o Start Date for when the expense should begin.
o Total Count (leave empty or set to -1 for unlimited cycles). - Click Save to schedule the recurring expense.
Importing Expenses
- Click the Import button to bulk upload expenses.
- Download the Sample Import File to format data correctly.
- Upload an Excel (.xls, .xlsx) or CSV file.
- Ensure that the file follows the Y-m-d date format (e.g., 2022-04-21).
- Enable the File Contains Headings Row option if applicable.
- Click Upload and Move to Next Step to process the data.
Expense Approval Workflow
- Expenses are assigned one of the following statuses:
- Pending – Awaiting approval.
- Approved – The expense has been verified.
- Rejected – The expense was declined.
- Users with the appropriate permissions can update the status.
Bank Account
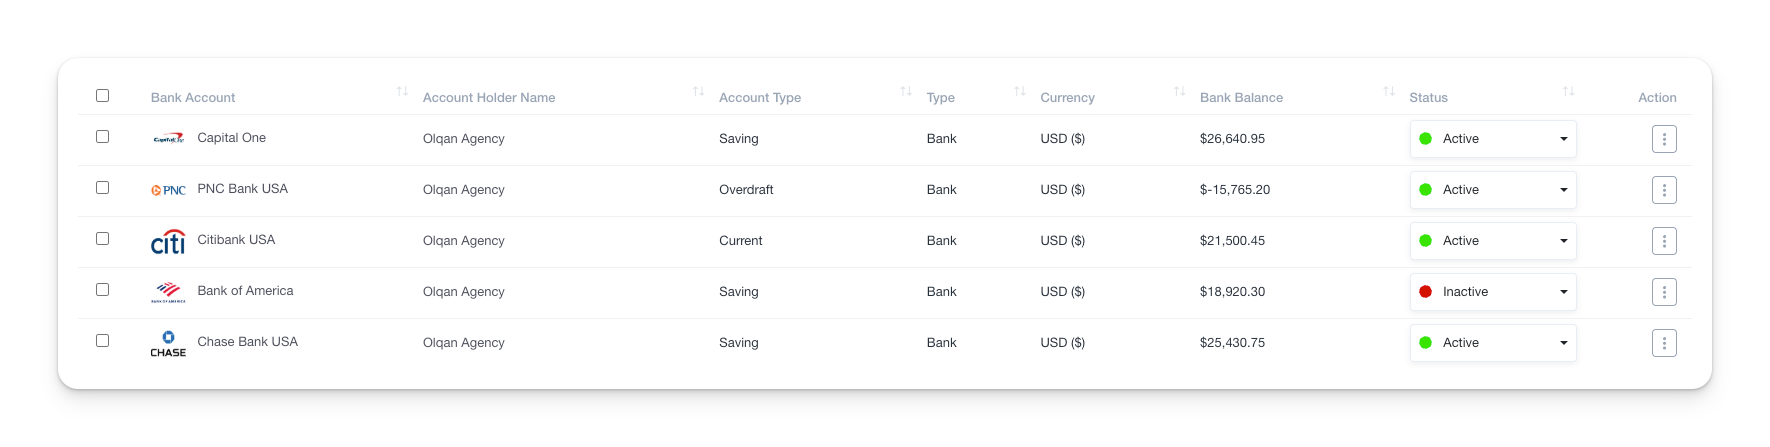
Viewing Bank Accounts
- Navigate to Finance from the sidebar menu.
- Click Bank Account to access the list of registered bank accounts.
- The page displays columns for Bank Account Name, Account Holder Name, Account Type, Currency, Balance, Status, and Actions.
- If no accounts are available, the table will display “No data available in table.”
- You can use the Search bar to find a specific account.
Adding a New Bank Account
- Click the Add Bank Account button.
- Fill in the required details:
- Type: Choose between Bank or Cash.
- Bank Name: Enter the bank’s name.
- Account Holder Name: Provide the account holder’s full name.
- Account Number: Input the bank account number.
- Account Type: Select from options like Saving or Current.
- Currency: Choose the account’s currency.
- Opening Balance: Enter the initial balance for this account.
- Contact Number: Provide the bank’s contact number.
- Status: Set the account status.
- Bank Logo: Upload an image of the bank logo if needed.
- Click Save to add the account.
Exporting Bank Accounts
- Click the Export button to download a report of bank accounts in a structured format.