
Get Your Work Done in One Tool
How can we help you?


Popular categories
Explore top categories curated for your interests and needs


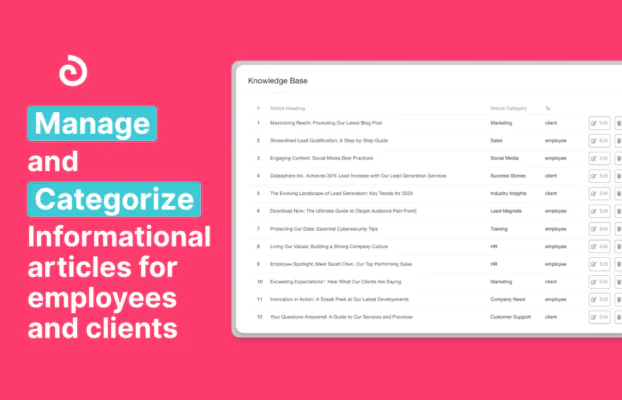
Handpicked Articles
Curated insights and expert guidance, all in one place


Frequently Asked Questions
General FAQs
Olqan is an all-in-one business platform designed to unify your operations, automate workflows, and help your business scale efficiently. Instead of juggling multiple tools, Olqan brings everything you need into one seamless workspace.
Olqan is built for business owners, founders, CEOs, solopreneurs, freelancers, and operations managers who want to streamline their processes and eliminate the headaches of managing multiple disconnected tools.
Olqan is truly comprehensive, combining project management, customer relationship management (CRM), invoicing, team collaboration, task automation, and business analytics in one unified platform. We also offer procurement management, inventory tracking, asset management, a robust ticketing system, and complete HR functionality including recruitment and payroll processing. Everything you need to run your business efficiently is included in one seamless system.
Not at all! Olqan is designed with simplicity in mind. Our intuitive interface makes it easy for anyone to get started, regardless of technical background. If you can use email, you can use Olqan.
Most users can set up their Olqan workspace and import existing data in under an hour. Our guided onboarding process and templates help you get started quickly, and you'll continue to discover efficiencies as you use the platform.
For most businesses, absolutely! Olqan is designed to replace your fragmented stack of business tools with one unified platform. It handles project management, CRM, invoicing, team collaboration, task automation, business analytics, procurement management, inventory tracking, asset management, ticketing systems, recruitment processes, HR management, and payroll processing all in one place. Some highly specialized businesses may still need certain industry-specific tools, but Olqan integrates with popular services to keep everything connected.
Security is our priority. Olqan uses bank-level encryption, regular security audits, and follows industry best practices for data protection. Your business data is backed up automatically and protected with multiple layers of security.
Getting started is simple! We offer multiple ways to begin your Olqan journey, including special early access opportunities for founding members. Join our waitlist to be first in line for exclusive launch offers and to secure the most favorable terms available.
We release updates and new features every month based on customer feedback and emerging business needs. As an Olqan customer, you'll always have access to the latest capabilities without having to manage updates yourself.
Unlike point solutions that solve just one aspect of your business, Olqan provides a truly unified experience. Our platform was built from the ground up to work as a cohesive system, eliminating data silos and creating workflows that weren't possible with disconnected tools.
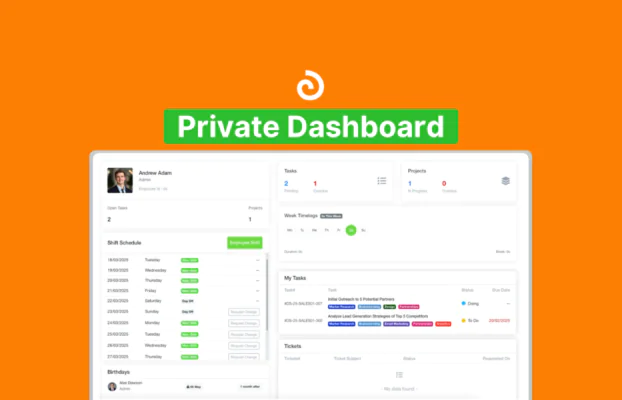
Dashboard FAQs
The Private Dashboard in Olqan serves as the central hub where users can monitor key metrics, tasks, and updates related to their organization. It offers quick access to essential information, helping streamline workflow management.
The Private Dashboard displays:
- User profile information, including name, employee ID, and profile picture.
- Task and project summaries, such as pending tasks, overdue tasks, and ongoing projects.
- Widgets for important information, including notice period duration, probation dates, birthdays, and employee appreciations.
- A calendar view for scheduled events and meetings.
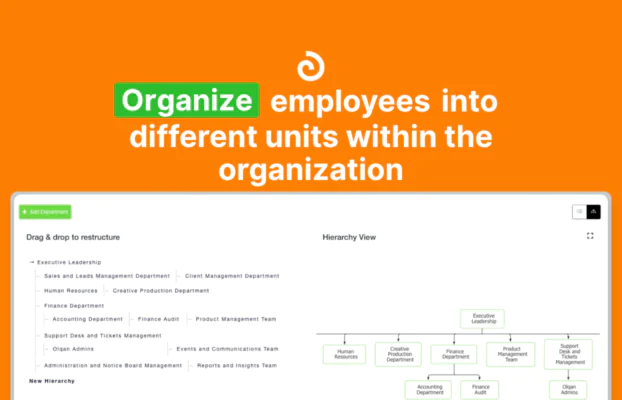
You can navigate between different sections using the left navigation menu, which includes the following primary tabs:
- Dashboard – The home screen providing an overview of tasks, projects, and events.
- Leads – Manage business leads and potential opportunities.
- HR – Access employee-related data, leave management, and HR analytics.
- Work – Track work assignments, milestones, and project updates.
- Finance – Manage financial transactions, proposals, and reports.
- Products – Handle product listings, inventory, and related operations.
- Reports – Generate analytical reports for various business operations.
- Settings – Customize user preferences, notifications, and system configurations.
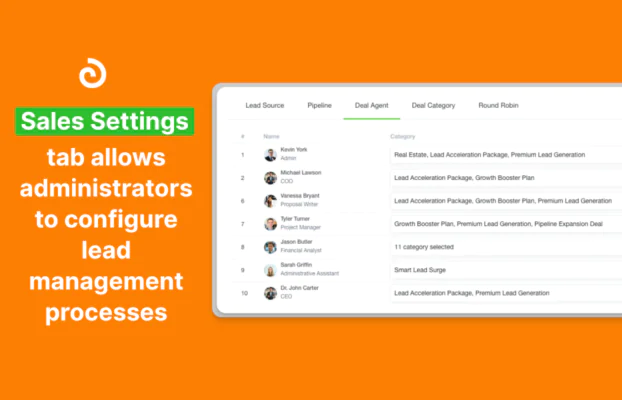
Lead Management FAQs
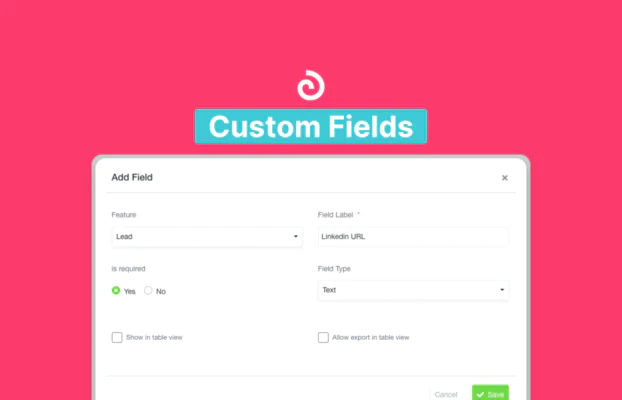
To add a new lead:
- Go to Leads > Lead Contact.
- Click the + Add Lead Contact button.
- Enter the lead details, including salutation, name, email, lead source, and company details (if applicable).
- Click Save to add the lead.
Yes, you can import leads in bulk using an Excel or CSV file:
- Go to Leads > Lead Contact.
- Click the Import button.
- Upload your file and map the columns to the corresponding fields in Olqan.
- Click Submit to complete the import.
To export leads:
- Go to Leads > Lead Contact.
- Click the Export button.
- The system will generate an Excel file containing all lead data.
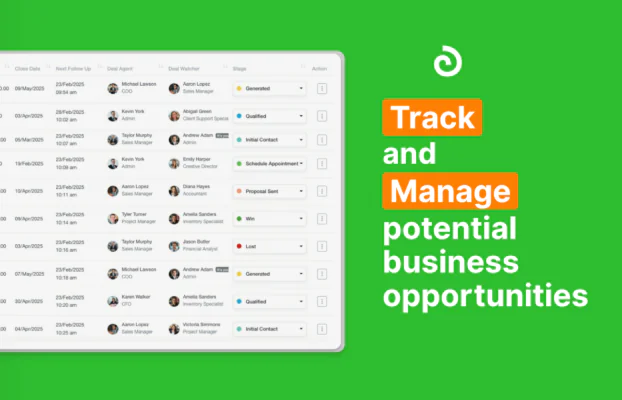
A lead is a potential business opportunity or contact, whereas a deal represents a specific business opportunity actively tracked through various stages (e.g., qualified, proposal sent, won, lost).
Project Suite FAQs
To create a new project:
- Go to Project Management > Projects.
- Click Add Project.
- Enter the project details, including project name, start date, deadline, project category, and client.
- Add project members and configure additional settings as needed.
- Click Save to create the project.
Yes, you can import projects in bulk using an Excel or CSV file:
- Go to Project Management > Projects.
- Click Import.
- Upload your file and map the columns to the appropriate fields.
- Click Submit to complete the import.
You can track task progress using the Task Board or Task Calendar:
- Task Board – A Kanban-style view that allows you to move tasks between different stages (e.g., To Do, In Progress, Completed).
- Task Calendar – Displays tasks scheduled over time, helping you manage deadlines and prioritize work.
To log time for tasks:
- Go to Project Management > Timesheet.
- Click Log Time.
- Enter the required details, including project, task, employee, start time, and end time.
- Click Save to log the time.
HR Portal FAQs
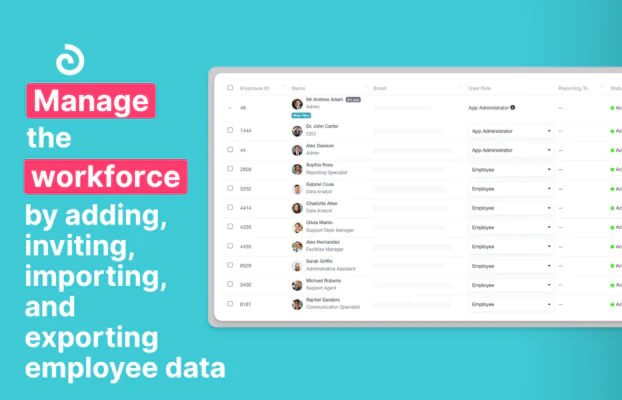
To add a new employee:
- Go to HR > Employees.
- Click Add Employee.
- Enter the employee details, including name, email, designation, department, and joining date.
- Click Save to add the employee.
Yes, you can invite employees via email or a link:
- Go to HR > Employees.
- Click Invite Employee.
- Choose to invite by email or generate an invite link.
- Send the invitation to the employee.
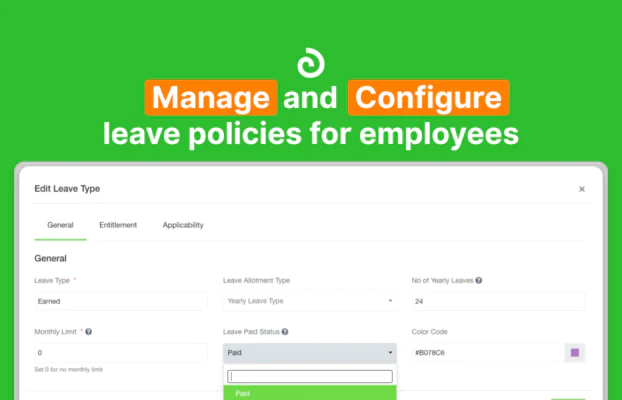
To manage leave requests:
- Go to HR > Leaves.
- Click New Leave to create a leave request.
- Enter the leave details, including employee name, leave type, duration, and reason.
- Click Save to submit the leave request.
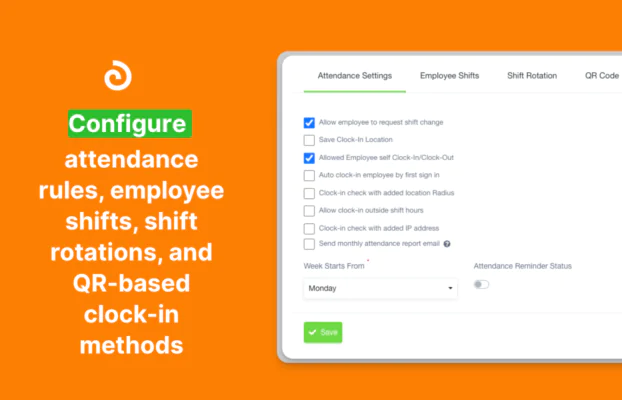
You can track employee attendance using the Attendance module:
- Go to HR > Attendance.
- View attendance records for the selected month and year.
- Use filters to refine results by employee, department, or designation.
Finance Consolet FAQs
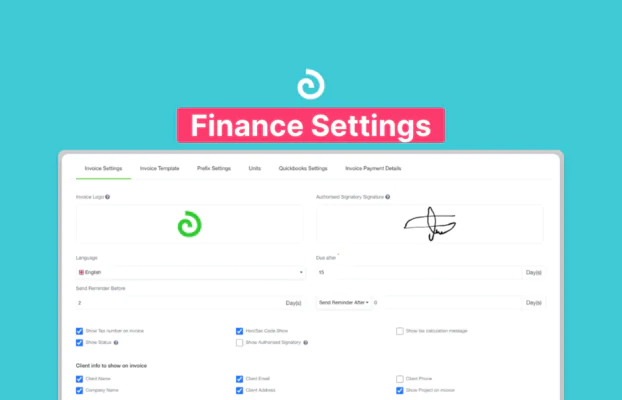
To create an invoice:
- Go to Finance > Invoices.
- Click Create Invoice.
- Enter the invoice details, including client, project, invoice date, due date, and line items.
- Click Save to finalize the invoice.
Yes, you can create recurring invoices:
- Go to Finance > Invoices.
- Click Recurring Invoice.
- Enter the billing frequency, start date, and number of billing cycles.
- Click Save to schedule the recurring invoice.
You can track payments using the Payments module:
- Go to Finance > Payments.
- View the list of recorded payments, including invoice number, client, amount paid, and payment date.
- Use filters to refine results by client, project, or payment status.
To manage expenses:
- Go to Finance > Expenses.
- Click Add Expense to record a new expense.
- Enter the expense details, including item name, price, purchase date, and employee.
- Click Save to record the expense.
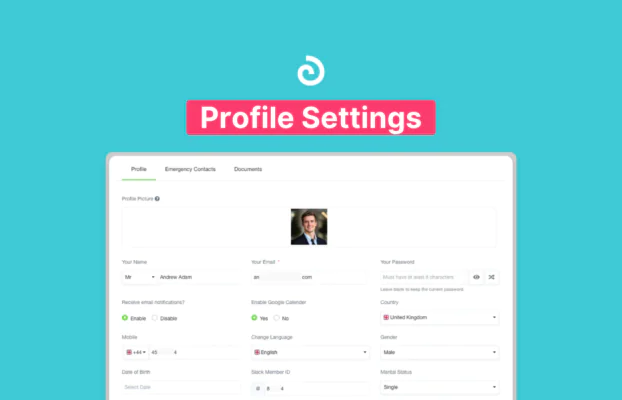
Settings FAQs
You can customize the appearance of Olqan using the Theme Settings:
- Go to Settings > Theme Settings.
- Upload logos for light and dark modes, set a favicon, and choose a branding style.
- Click Save to apply the changes.
To enable Two-Factor Authentication (2FA):
- Go to Settings > Security Settings.
- Choose to enable 2FA via email or Google Authenticator.
- Follow the on-screen instructions to complete the setup.
To manage user roles and permissions:
- Go to Settings > Roles & Permissions.
- Click Manage Role to create or modify roles.
- Assign permissions to each role, including view, add, update, and delete access for different modules.
To configure notification settings:
- Go to Settings > Notification Settings.
- Choose the notification channels (email, Slack, push notifications).
- Enable or disable specific notifications for different modules.
- Click Save to apply the changes.
Reporting FAQs
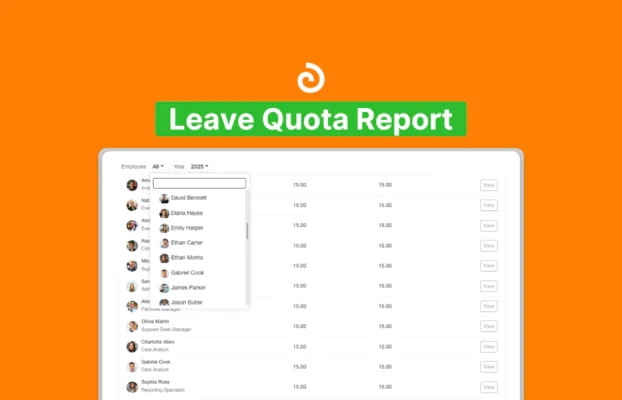
To view leave balances:
- Go to Reports > Leave Quota Report.
- View the list of employees along with their total leave and remaining leave balance.
- Use filters to view data by employee or year.
To view a time log report:
- Go to Reports > Time Log Report.
- Use filters to refine results based on employee, project, or date range.
- Click Export to download the report.
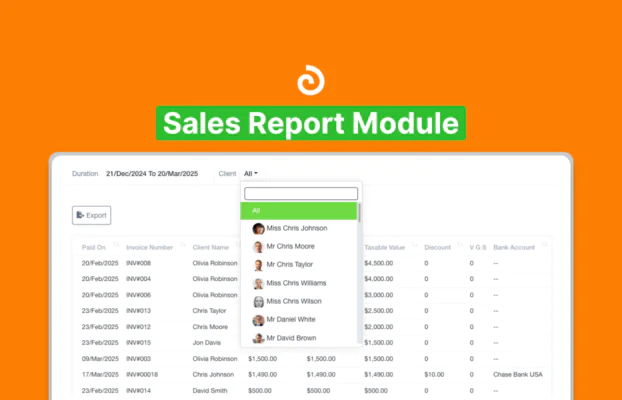
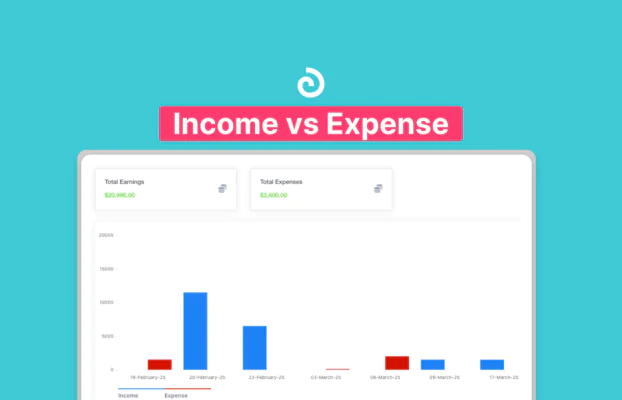
You can track financial performance using the Finance Report:
- Go to Reports > Finance Report.
- View total earnings, financial trends, and a detailed list of invoices.
- Use filters to refine results by client, project, or date range.
To generate a task report:
- Go to Reports > Task Report.
- Use filters to refine results based on status, date, or project.
- Click Export to download the report in Excel format.
To view leave balances:
- Go to Reports > Leave Quota Report.
- View the list of employees along with their total leave and remaining leave balance.
- Use filters to view data by employee or year.
Integration FAQs
Yes, you can integrate Olqan with Google Calendar:
- Go to Settings > Google Calendar Settings.
- Enable the integration and choose which modules to sync (leads, tasks, events).
- Click Save to apply the changes.
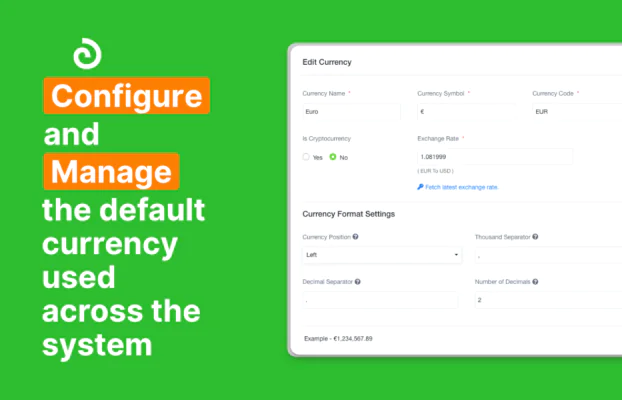
To integrate Olqan with QuickBooks:
- Go to Settings > Finance Settings > QuickBooks Settings.
- Enter your QuickBooks client ID and client secret.
- Click Save to enable the integration.
Billing FAQs
To request an offline payment:
- Go to Settings > Billing > Offline Request.
- Fill in the required details, including package and payment information.
- Click Submit to request approval.
To upgrade your subscription plan:
- Go to Settings > Billing > Plan Details.
- Click Upgrade Plan.
- Follow the on-screen instructions to select and purchase a higher-tier plan.
To view your purchase history:
- Go to Settings > Billing > Purchase History.
- View the list of past transactions, including package name, payment date, and amount.
