Ticket Settings
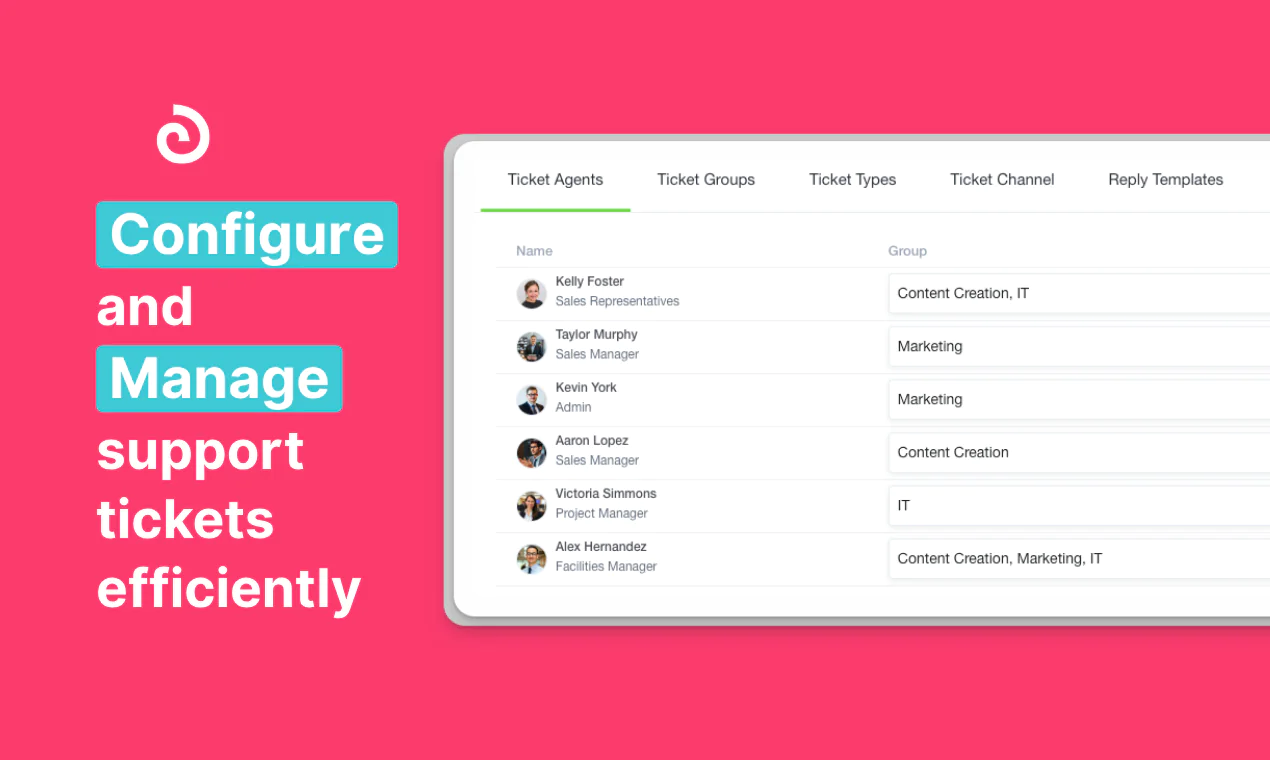
The Ticket Settings section in Olqan allows administrators to configure and manage support tickets efficiently. This section includes managing ticket agents, groups, types, channels, reply templates, and distribution methods.
Ticket Agents
- Users can add new ticket agents by clicking “Add New Agents”.
- Each agent is assigned to a specific group (e.g., Content Creation, Marketing).
- The status of agents can be set to Enabled or Disabled.
- Agents can be removed using the Delete button.
Ticket Groups
- Administrators can create and manage groups by selecting “Add New Group”.
- Groups categorize tickets efficiently for better organization.
- Existing groups like Content Creation and Marketing can be edited or deleted.
Ticket Types
- Users can create and manage different types of tickets by clicking “Add New Ticket Type”.
- Predefined ticket types include Bug, Suggestion, Question, Sales, Code, Management, Problem, and Incident.
- Ticket types can be edited or deleted as needed.
Ticket Channels
- This section manages how tickets are received.
- Users can add new channels by selecting “Add New Ticket Channel”.
- Available channels include Email, Phone, Twitter, and Facebook.
- Channels can be edited or deleted.
Reply Templates
- Users can create predefined responses by clicking “Add New Template”.
- Currently, no templates exist, but they can be added for quicker replies.
Round Robin Assignment
- This method ensures fair ticket distribution among agents.
- Equal Distribution: Tickets are evenly distributed.
- Sequential Assignment: Each task is assigned to the next available agent.
- Fair Rotation: Ensures workload balance.
- Example: Ticket 1 is assigned to Agent A, Ticket 2 to Agent B, Ticket 3 to Agent C, then the cycle repeats.
With Ticket Settings, Olqan provides a structured and automated approach to managing support tickets efficiently.
Ticket Visibility Settings
- Defines what tickets agents can view and edit.
- Options include:
- All Tickets: Agents can view and edit all tickets.
- Tickets in a Group: Agents can view and edit tickets assigned to their group(s).
- Assigned Tickets (Selected in the screenshot): Agents can only view and edit tickets assigned to them.
Adding a New Ticket Agent
- Administrators can assign ticket agents by selecting “Add New Agents”.
- The Choose Agents field allows selecting an agent from the available users.
- The Assign Group field categorizes the agent under a specific department (e.g., Content Creation).
- Once configured, clicking Save adds the agent to the selected group.
- Agents can later be enabled, disabled, or removed as needed.